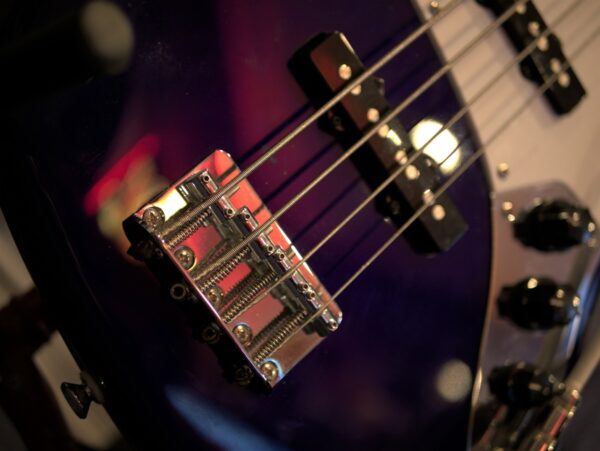
Owning a bass guitar is not just about playing it—it’s about understanding how to care for it to keep it sounding and playing its best. Whether you’re a beginner or an experienced bassist, setting up and maintaining your bass guitar is essential for achieving optimum performance and prolonging its lifespan. Gerard Zappa of Cincinnati will walk you through the steps for setting up and maintaining your bass guitar, ensuring you’re ready to rock at all times.
Why Proper Setup and Maintenance Matter
The bass guitar is a powerful instrument that anchors the rhythm and harmony of music. However, even the most expensive bass won’t sound great or feel comfortable to play without proper setup and care. A well-maintained bass guitar ensures:
- Playability: Strings that are too high or too low can hinder your technique.
- Tone Quality: An improperly maintained instrument may produce buzzing, dead notes, or an uneven tone.
- Durability: Regular upkeep prevents damage to the neck, frets, and electronics.
Step 1: Tools You’ll Need
Before diving into the setup, gather the necessary tools:
- String winder and cutter
- Phillips and flathead screwdrivers
- Allen wrenches (specific to your bass model)
- Electronic tuner or tuning app
- Microfiber cloth
- Lemon oil (for rosewood fretboards)
- Ruler or string action gauge
Step 2: Setting Up Your Bass Guitar
1. Tune Your Bass
Start with tuning. Use an electronic tuner to ensure your bass is in standard tuning (E, A, D, G) or your desired alternate tuning. Proper tuning is crucial for accurate setup measurements.
2. Adjust the Truss Rod
The truss rod controls the curvature of the neck, which directly affects playability. Here’s how to adjust it:
- Check Neck Relief: Press down on the first and last frets of the low E string and look at the gap between the string and the 8th fret. There should be a small clearance—around the thickness of a business card.
- Make Adjustments: If the gap is too large, tighten the truss rod by turning it clockwise. If the gap is too small, loosen it by turning counterclockwise. Adjust in small increments (quarter-turns), and re-check frequently.
3. Set the String Height
String height (action) affects how easy the bass is to play and how cleanly it produces sound. Use a ruler or string action gauge to measure the distance between the bottom of each string and the top of the 12th fret. Common action settings are:
- E string: 2.4mm (low action) to 2.8mm (medium action)
- G string: 2.0mm (low action) to 2.4mm (medium action)
Adjust the bridge saddles using the appropriate screwdriver or Allen wrench to achieve the desired action.
4. Adjust the Intonation
Intonation ensures your bass plays in tune across the fretboard. To adjust:
- Play a harmonic note at the 12th fret and compare it to the fretted note at the same fret.
- If the fretted note is sharp, move the saddle back (away from the neck). If flat, move the saddle forward (toward the neck).
- Repeat for all strings.
5. Check Pickup Height
The distance between the pickups and the strings affects the output volume and tone. Generally, the pickups should be closer to the strings on the higher (G) side and slightly farther on the lower (E) side. Adjust using the screws on either side of the pickups.
Step 3: Maintaining Your Bass Guitar
1. Regular Cleaning
- Strings: Wipe down your strings after every use with a microfiber cloth to remove sweat and oils that can cause corrosion.
- Fretboard: For rosewood or ebony fretboards, use lemon oil sparingly to clean and hydrate the wood. Avoid using lemon oil on maple fretboards—use a damp cloth instead.
- Body: Use a clean microfiber cloth to remove dust and smudges. A guitar-specific polish can be used occasionally for a glossy finish.
2. Change Strings Regularly
Strings lose their tone and elasticity over time. Change them every 1–3 months, depending on how often you play. Coated strings can last longer but may cost more.
3. Inspect the Hardware
Periodically check the tuning pegs, bridge, and strap buttons for looseness. Tighten screws as needed and lubricate moving parts (like tuning pegs) with a small amount of machine oil.
4. Protect Your Bass
- Use a Case: Always store your bass in a hardshell or padded gig bag when not in use to protect it from dust, humidity, and physical damage.
- Avoid Extreme Temperatures: Rapid changes in temperature and humidity can warp the neck or damage the finish. Use a humidifier if you live in a dry climate.
5. Keep Electronics in Check
Clean the input jack and knobs periodically with electronic cleaner. If you notice crackling or intermittent sound, inspect the wiring and solder joints. Replace the battery for active pickups as needed.
When to Seek Professional Help
While most setup and maintenance tasks can be done at home, there are times when consulting a professional is the best choice:
- Persistent fret buzz or dead spots
- Warped neck
- Complex electronics issues
- Refret or fret leveling work
Setting up and maintaining your bass guitar is a rewarding process that ensures the instrument performs at its peak. By regularly tuning, cleaning, and making necessary adjustments, you’ll enhance playability, tone, and longevity. Whether you’re jamming at home or performing live, a well-maintained bass guitar will never let you down.
Start applying these tips today, and your bass will thank you by delivering years of rhythmic grooves and rich tones.
